JoJo's Bizarre Adventure: All-Star Battle (ジョジョの奇妙な冒険 オールスターバトル JoJo no Kimyō na Bōken Ōru Sutā Batoru) is a fighting game based on the JoJo's Bizarre Adventure franchise, developed by CyberConnect2W and published by Namco Bandai GamesW. The game was released exclusively for the PlayStation 3 on August 29, 2013.
The game includes major characters from each part, from Phantom Blood to JoJolion[1], eventually including the protagonist from Baoh: The Visitor as a guest character, for a total of 32 in-game characters and 9 DLC characters; A combined 41 characters in all.
Along with the Anime, it was announced on July 5, 2012 to coincide with the 25th anniversary of the series. The game was the winner of the 2012 "Japan Game Awards" and was scored 40/40 by FamitsuW.
In the US and EU releases, some names have been changed to avoid copyright issues whilst still retaining the naming themes Araki was aiming for. The game was released on April 25, 2014[2] in Europe, and April 29, 2014 in the US.
Gameplay
All-Star Battle has a 2.5D fighting style with 3D cell-shaded characters. Gameplay in All Star Battle shares similarities with JoJo's Bizarre Adventure: Heritage for the Future, and boasts a wide variety of different styles, rules, and abilities among each individual fighter.
- Each character has a Style button which triggers a specific action depending on their Style. For example, Jotaro's Style summons Star Platinum, a signature trait among most with the "Stand" Style, while Young Joseph's allows him to utilize the Ripple to charge his Heart Heat Gauge using the ability "Ripple Breath" (shared among all "Ripple" Style characters).
- There are 6 Style types: Ripple/Hamon, Vampirism, Mode, Stand, Mounted, and Baoh Armed Phenomenon. Each character has one of these types of Style with the exception of DIO (Stand, Vampirism), Old Joseph (Ripple/Hamon, Stand), and Vanilla Ice (Stand, Vampirism). This excludes the 2 Mounted characters (Johnny Joestar & Gyro Zeppeli), who also have Stands, but that trait is shared with both characters, so it is consistent with the Mounted Style type.
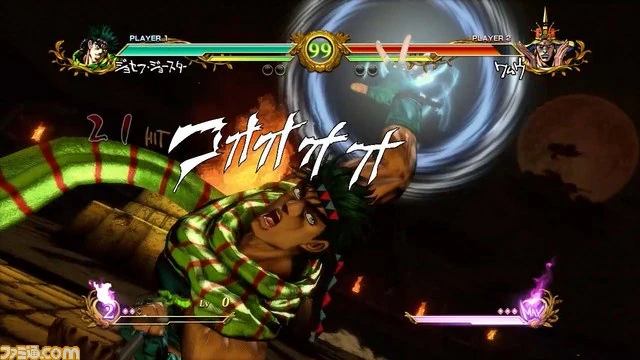
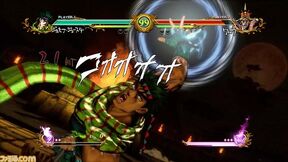
- The game's HUD contains 3 Gauges: Health/Stamina (how much damage a character can receive before being K.O. or Retired), Guard (how long a character can block incoming attacks before a "Guard Break" occurs, leaving them vulnerable), and the Heart Heat Gauge (shortened to "HHG"; name for the game's 'super meter') which stocks up to 3 times. Some characters also have extra icons/gauges over the Heart Heat Gauge:
- Young Joseph Joestar has a Trick system or "Guess I did it again!" Level that makes any of his Ripple-based and Ripple-enhanced attacks permanently stronger every time he counters with three different abilities, with the level capping at 3.[3]
- Vanilla Ice has a Stand Power Gauge that shows how much Cream can be used.
- Akira Otoishi has an Power Gauge that ties in with Red Hot Chili Pepper's available strength and ability power.
- Shigekiyo "Shigechi" Yangu has an icon showing if Harvest is in Offensive or Defensive Formation, which determines the abilities he can use.
- Guido Mista has an Ammunition Icon for the amount of bullets he has left in his revolver's cylinder, and a Pistols Icon above showing which of Sex Pistols are currently available for use.
- Pannacotta Fugo has a Capsule Icon showing which of Purple Haze's 6 bulbs containing its Homicidal Virus are available or broken.
- Ermes Costello has an icon showing the stickers applied to herself at the current time when she uses the ability "Here's where ya stick it!".
- Pucci has a Green Baby Gauge that displays 14 rhombus icons and his progress towards evolving Whitesnake into C-Moon.
- Johnny Joestar has a Tusk Icon showing his ammunition for Tusk ACT2 and beyond, as well as a Tusk's Growth icon displaying his Stand's current ACT, up to ACT4.
- Gyro Zeppeli has Steel Ball Icon displaying which of his 2 Steel Balls are in his possession for use, and a Golden Spin Gauge that ties in with the strength and properties of attacks utilizing said Steel Balls.
Game mechanics are similar to JoJo HD
- One stock of Heart Heat Gauge can be used to perform a Heart Heat Attack (ハートヒートアタック Hāto Hīto Atakku, shortened to "HHA"), while two stocks can be used to perform a Great Heat Attack (グレートヒートアタック Gurēto Hīto Atakku, shortened to "GHA").
- Some characters have special attributes and abilities of their own: Jonathan Joestar can perform "This is my final Ripple!" which replenishes some of his health after an initial K.O. at the cost of a stock of the HHG; Hol Horse receives a decrease in offensive power and a boost to HHG generation if he is fighting a female character (passive effect referred to as "Hol Horse loves the ladies!"); Josuke Higashikata can have a defense and offense boost along with unflinching if a counter that causes the opponent to insult his hair (named "Watch your mouth!") succeeds; Guido Mista's Heart Heat Gauge will decrease if he is attacked with 4 bullets left ("Unlucky Number 4"); and Johnny Joestar, Gyro Zeppeli, and Funny Valentine can collect Holy Corpse Parts for special abilities and bonuses to stats.
- Once Gyro has collected a singular Corpse Part, he can use "Scan", a new attack that deals substantial damage.
- Once Valentine has collected all Saint Corpse Parts, he can activate "D4C -Love Train-", which reduces damage and nullifies most projectiles.
- A Stylish Dodge can be performed to completely evade an attack, shown as a character performing one of their signature/more popular poses while sliding clockwise or counterclockwise of the attacker. It costs a third of the Guard Gauge, but generally gives an opening for a counter-attack.
- Taunts can deplete the opponent's Heart Heat Gauge if activated while they are down, emphasized by the battle pausing and the camera closing in on the taunting player. Though the amount lost is insubstantial and regained very easily, it can still be used to prevent an opponent from utilizing a stock or two for a crucial point in time.
- There exists special taunt attacks that can extend combos but can only be used once per an entire battle. Once an opponent is down, specific characters sending out projectile attacks (particularly low-flying ones) or setting a trap must Puttsun Cancel and taunt. This causes the opponent to get up into said projectiles/trap and be hit without breaking a combo, leaving them open to further attacks. All projectiles pause during taunts and make the taunt attack possible until it actually succeeds. Afterwards they will continue flying or merely cease when the taunt activates.
- Like with many fighting games, different types of attacks have different properties which can bypass guarding: High attacks are standard and the most common among abilities, able to be guarded against by both a standing and crouching opponent; Middle attacks can only be guarded against by standing opponents, hitting them if they are crouching (e.g. all air attacks); Low attacks can only be guarded against by crouching opponents, hitting them if they are standing (e.g. all crouching attacks).
- The game has chain combos with normal attacks Light, Medium, and Heavy, but there is also an Easy Beat (イージービート Ījī Bīto) option. By simply pressing the Light attack button repeatedly, a character will perform a combo with a HHA at the end.
- The Easy Beat almost always follows a combo of "Light attack > Medium attack > Heavy attack > A specific move/set of moves from the character's arsenal > High Heat Attack (if available and can be chained into)". The only cases where Easy Beat does not end in an HHA is when the character's HHA is not an attack, rather a special power-up, counter, or delayed Throw.
- The game's RC mechanic is Puttsun Cancel (プッツンキャンセル Puttsun Kyānseru, lit. "Strange Cancel"). By spending a stock of the Heart Heat Gauge while in the middle of a normal attack or skill, the character will stop that attack instantly and completely with a flashing pose as the rest of the screen darkens, either giving the player a chance to initiate a HHA (though HHA can often be used instantly in the middle of an attack regardless), GHA, string longer combos, or make moves less punishable.
- Most Stand Users also have another form of canceling called the Stand Rush. It is performed by pressing the Style button during a compatible special move and spends a quarter to half of the Heart Heat Gauge depending on the move in question. This will cause the character and their Stand to 'de-sync', giving player control back to the Stand User before a Stand finishes its attack and opening up opportunities for conjunction attacks, as well as new combos and set-ups.
- There are stage gimmicks. Each stage has two variations; one with all the hazards/gimmicks and Situation Finish on and another with all the stage hazards/gimmicks off.
- Stage Hazards are activated by someone falling down on a representative series of red (or pink) waves that stem from the hazard, and have their paths or areas of effect highlighted on the ground.
- Some hazards occur continuously in set intervals after they have been triggered, while others only occur once the entire battle. The latter of which often have more severe effects than the former, such as more damage.
- Some hazards, such as Weather Report's frog rain, will deal status effects such as poison, represented by the life bar turning purple.
- The Philadelphia Coastline's stage gimmick is Ticket to Ride's blessing, rewarding either fighter with a free bar of the Heart Heat Gauge. This marks it as the only benevolent stage gimmick, rather than a harmful stage hazard.
- There are no quick time events in the game.
- Characters receive an automatic boost in stats when their health is critically low, with the character's health flashing red while in Go Go Go Mode or gold in Preparedness/Resolve Mode.
- Go Go Go Mode (ゴゴゴモード Go go go Mōdo, lit. "Rumble Mode" and referred to as such in the English localization): Activated at 25% health. Attack power increases and Guard and Heart Heat Gauges fill up faster.
- Preparedness/Resolve Mode (覚悟モード Kakugo Mōdo): Activated at 15% health. In addition to the benefits of Go Go Go Mode, if in the middle of an attack, a character will not wince/flinch from their opponent's own attacks. Only 5 characters can activate this mode: Giorno, Bruno, Mista, Fugo, and Ermes.
- Much like the original fighting game, if two attacks of similar properties clash, the fighters will enter a "Blazing Fists" match, now named "Rush Mode" match where they must mash buttons faster than each other to gain a free hit.
- Steel Ball Run characters, Johnny, Gyro, and Valentine are the only characters who can collect the Corpse parts during a match. They each gain unique benefits for every part they currently have, but lose a part each time they are knocked down. They need to collect 3 parts of the Corpse in exchange for their final advantage in the fight (unlimited Steel Ball gauge and permanent Golden Spin Mode for Gyro, charging the Heart Heat Gauge much faster for Johnny, D4C -Love Train- which nullifies projectiles and reduces overall damage for Valentine).
Game Modes
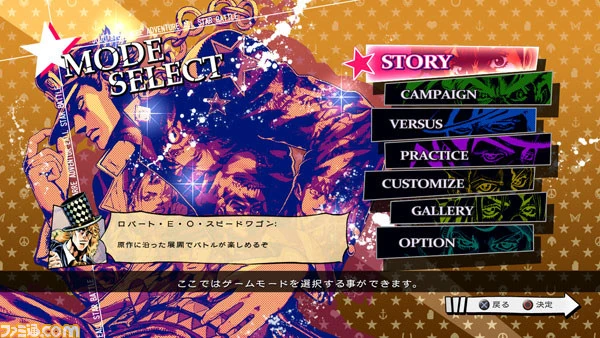
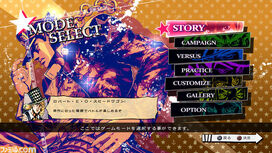
Main Menu
- Story Mode (ストーリーモード Sutōrī Mōdo): The player follows a much more shortened version of the JoJo's Bizarre Adventure story, in the form of text-based cutscenes between battles closely representing those that transpired in the manga.
- Campaign Mode (キャンペーンモード Kyānpēn Mōdo): The player goes into an online mode where, by spending energy, they can either fight the A.I.-controlled avatars of other players, or a specific character in a boss battle that usually take multiple bouts in order to beat. These matches reward the player with cosmetic features, such as new SFX, taunts, poses, outfit color schemes, and when a boss is defeated, special alternate outfits and costumes. Winning fights in this mode rewards the Player a certain amount of Campaign Score, allowing them to rise within the ranks. Campaign Score is also earned if the player's avatar wins a match.
- Versus Mode (バーサスモード Bāsasu Mōdo): The player can fight against the COM or another human being, either through local multiplayer, or online battles for rank.
- Practice Mode (プラクティスモード Purakutisu Mōdo): The player can practice character attacks, skills, and combos using different battle settings. Though the training dummy is usually an idling character that can be switched into an active COM state, a second player can be used to practice.
- Customize Mode (カスタマイズモード Kasutamaizu Mōdo): The player can customize their Campaign Mode avatar, and their Player Card for online matches. They can also customize characters' various taunt and victory poses, lines, and SFX earned in Campaign Mode.
- Gallery Mode (ギャラリーモード Gyararī Mōdo): The player can purchase and view voice lines, soundtracks, concept and publicity artwork, and unlocked poses and costumes, using Gold earned through battles in any mode other than Campaign Mode.
- Option Mode (オプションモード Opushon Mōdo): The player can customize the game's settings, and COM difficulty.
- Arcade Mode (アーケードモード Ākēdo Mōdo): This mode is only available in Western versions only. The player chooses a character and difficulty setting and participates in a gauntlet of eight battles against randomized COM opponents to win Gold and set/beat high scores based on accumulative grading within that difficulty.
Special Attacks (HHA/GHA) and abilities
- Jonathan's HHA is the Scarlet Overdrive he used to defeat Dio. Another Special is "The Last Ripple", which revives him at the cost of his Heart Heat gauge. His GHA is the Sunlight Yellow Overdrive, visually similar to the one he uses against Bruford the Black, with an added combo leading up to the climactic barrage.
- Zeppeli's HHA trips the opponent before unleashing the Ripple Punch he uses on the frog when first demonstrating Ripple to Jonathan. His GHA is "Taiyou no Hamon (Ripple of the Sun)", where he strikes the opponent with his little finger, readies his Ripple, and obliterates the opponent with a Sunlight Yellow Overdrive-style Zoom Punch.
- Dio's HHA is his Space Ripper Stingy Eyes. If Jonathan is KO'ed by this move, a special death animation will briefly play of Jonathan futilely trying to block the beams. His GHA is the freezing technique he used against Dire, beginning with a short beat down before shattering his victim while laughing.
- His HHA with Act 1 makes Act 2 appear and shoot to the ground, hitting the opponent.
- His HHA with Act 2 has Johnny shoot himself with Act 3 before Act 3 sends a hole after the opponent, resulting in him appearing behind them and shooting them repeatedly.
- His HHA with Act 3 and Act 4 has Act 4 appear and starts a barrage of punches, hitting the target into the ground before a second barrage pummels them while they are down.
- His GHA has him thrown off his horse, activating Act 4, after which he shoots his opponent before Tusk flies in and starts punching them repeatedly, before bearing through the opponent with an enlarged Tusk Act 4 head appearing behind the opponent, similar to how he attacked Funny Valentine. If this GHA is used against Valentine, a special scene plays where Valentine immediately activates D4C Love Train, only for Tusk to rip through it and punches D4C in the face.
Unique Special Attacks
In certain match-ups and under certain conditions, the special attacks for some characters change to how they are panned out in the manga. The examples include:
- Dio's HHA on Jonathan: When Space Ripper Stingy Eyes K.O.'s Jonathan, he will futilely attempt to block the lasers with his hands. He will also whisper "Erina..." as he falls.
- DIO's blood-sucking grab on Jonathan or any of his descendants (except for Johnny and JoJolion Josuke), after performing the move, he will stab his temple and taunt the opponent saying "This is the greatest kind of high!".
- If DIO's HHA is used during stopped time, instead he will just throw a wave of knives in a forward direction at the opponent.
- If DIO's GHA is used against Jotaro, Jotaro will retaliate with an "'ORAORAORA'" barrage from the underside of the steam roller. At some point during the animation, if Jotaro activates his own time stopping ability, 2 bars of Jotaro's own Heart Heat Gauge will be used as soon as the steam roller explodes and a new animation will begin, recreating the moment Jotaro stopped time himself to escape Dio's onslaught and damage will be minimized.
- When Jonathan is hit, Gold Experience jabs its thumb into Jonathan's eye, similar to what Dio did during their fighting match in their youth.
- When Dio is hit, his left eye and the left half of his mouth will close up and seem dead, similar to the state he was put in after being bisected by Jonathan.
- When Joseph is hit, his face will either contort into a similar reaction to his "OH NO!" face or contort into the face formed when the woman possessed under Caesar's ripple punches him when Joseph and Caesar first fight.
- When Lisa Lisa is hit, she'll put her hand up to her face to cover it, used in the same manner as when she tried to hide her crying for Caesar.
- When Esidisi is hit, his eyes begin to tear up, hinting at the fact he bawls to calm himself down.
- When Old Joseph is hit, his face contorts into his iconic "OH! MY! GOD!" face.
- When Polnareff is hit, his tongue will comically stretch up to his right ear similar to a situation where he was held at gunpoint by Hol Horse and tried to warn the others where he was.
- When Hol Horse is hit, he will spit his cigarette out from his mouth.
- When Vanilla Ice is hit, his face contorts similar to how he is enraged being fatally wound by Polnareff at near before dissolving into a dust.
- When DIO is hit, Gold Experience will punch his head in the temple, where Jotaro punched him during their fight (crushing that part of his skull) during the battle between them.
- When Rohan is hit, his face contorts to the face he had getting punched by Josuke for first time (after getting taken by surprise by Josuke's unexpected retaliation).
- When Shigechi is hit, his face contorts similar to how he looked when Kira blew him up, disfiguring it.
- When Kira is hit, his face contorts in a fashion similar to when he was first hit by Star Platinum.
- When Kawajiri is hit, his face contorts similar to what happened after Yoshihiro's death.
- When Bucciarati is hit, his jaw contorts extremely and a tooth will fly from his mouth, recreating the scene when he first gets punched in his first fight with Giorno.
- When Diavolo is hit, his face contorts similar after getting punched by Gold Experience Requeim.
- When Pucci is hit, Gold Experience will hold Pucci's head with the left hand to stop him from using a gravitation ability while punching him with the right, resembling how Pucci was defeated by Weather Report at the end of Stone Ocean.
- When Gyro is hit, his Go! Go! Zeppeli! teeth are shown when his mouth is open due to the punch.
- When Valentine is hit, his face contorts to look similar to the one caused by Tusk Act 4 pummeling D4C.
- When Josuke (JoJolion) is hit during the close up on his face his 'four eyes' and 'two tongues' brought on from him fusing with Yoshikage Kira will be clearly visible to see.
- When Baoh is hit, his reaction will be different depending on how much health he has.
- At high health, his expression will not change in the least.
- At low health, where his pupils are visible and Ikuro is more in control of his Baoh form, Baoh's face will repeatedly distort left and right.
- When Jonathan is hit, he will try to clean his mouth with his handkerchief (similar to when he tried to clean it after getting beat up as a boy).
- When Dio is hit, he holds his head as when he was bisected by Jonathan and trying to fix it.
- When Caesar is hit, he'll start swinging at the air (similar to him attempting to hit Wamuu while his body is too exhausted).
- When Lisa Lisa is hit, she places her hand near her face (much like her reaction to Caesar's death)
- When DIO is hit, he starts clawing at his own body as when after he was healed with Joseph's blood.
- When Old Joseph is hit, he makes his "OH MY GOD!!!" expression, hands holding his face.
- When Iggy is hit, he'll act like a "normal dog" and play dumb (this was used in order to fool Pet Shop).
- When Okuyasu is hit, he places his hand to his mouth in an attempt to try to "catch his teeth" (Pearl Jam chapters).
- When Rohan is hit, he punches himself much like he did when his Stand was under Boy II Man's control.
- When Kira is hit, he starts looking at his hands (waking up in Reimi's Alley after his death).
- When Diavolo is hit, he'll make the same pose during one of his "many deaths".
- When Gyro is hit, he pulls his hair and widens his mouth (in reference to his "7 Days in a Week" gag).
Stages
There are 12 stages, 1 or 2 from each series, and one special stage. Each stage has two variations type, one with all the stage hazards and situation finishes on and another with the same hazards off, which can be changed on the Stage Select Screen.
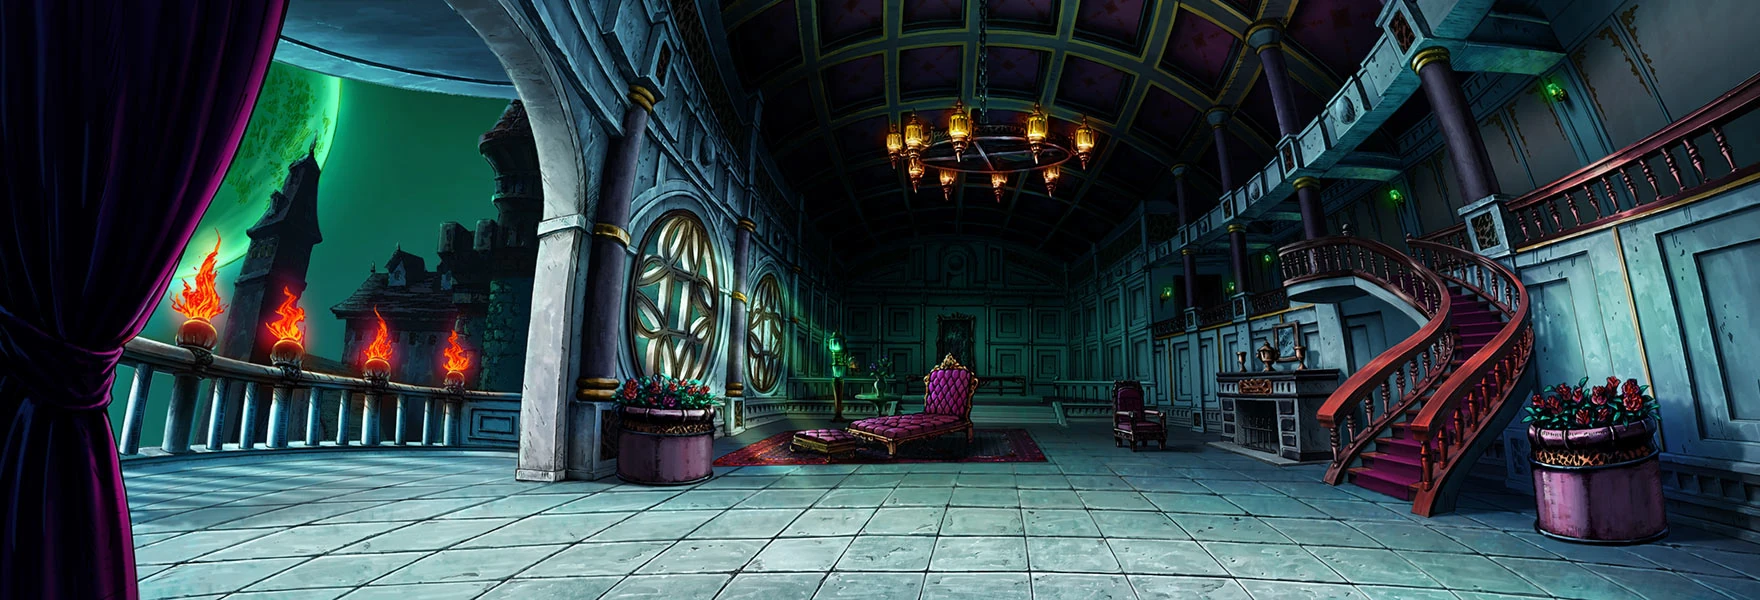
- Dio's Castle (ディオの館 Dio no Yakata) (from Phantom Blood): Windknights
- Stage Hazard: A chandelier falls from the ceiling, damaging whoever is directly underneath it.
- Situation Finish: Loser is sent flying off the balcony (recreating Dio's defeat in his battle against Jonathan in his castle).
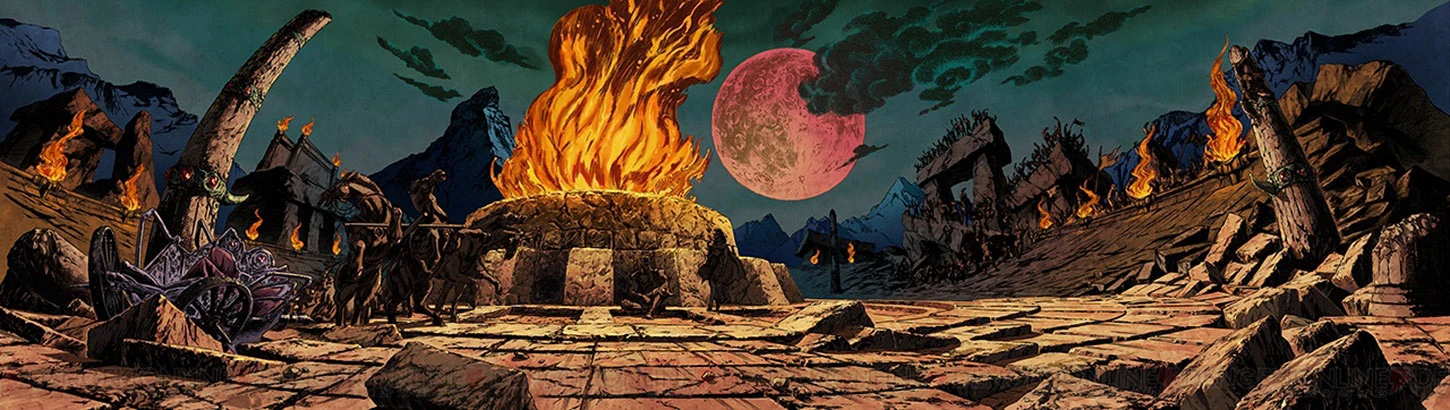
- The Battlefield (闘技場 Tōgijō) (from Battle Tendency): Skeleton Heel Stone
- Stage Hazard: Vampire Horses charge through the players, returning an unlimited amount of times.
- Situation Finish: The Vampire Horses will trample the loser to death.
- DIO's Mansion (DIOの館 Dio no Yakata) (from Stardust Crusaders): Cairo
- Stage Hazard: Nukesaku jumps down and attacks the players, returning an unlimited amount of times.
- Situation Finish: Loser is thrown out the second story window (Vampires and Pillar Men will be disintegrated by the sun's light, normal characters will merely fall to their deaths).
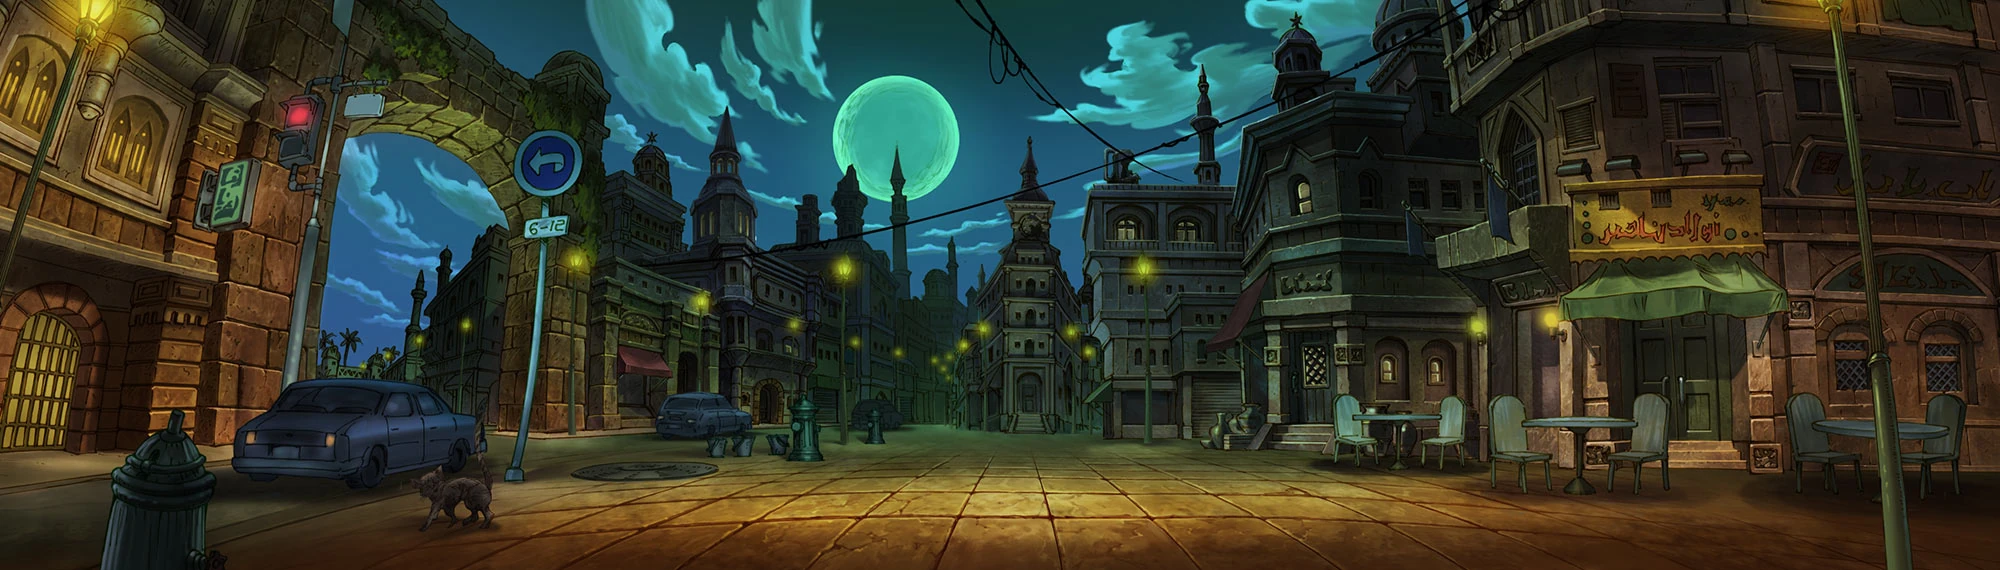
- Cairo Streets (カイロ市街 Kairo Shigai) (from Stardust Crusaders): Cairo
- Stage Hazard: Wilson Phillips' car will drive through the players on DIO's orders.
- Situation Finish: Loser is sent flying and crashing into a water tower recreating Noriaki Kakyoin's death scene.
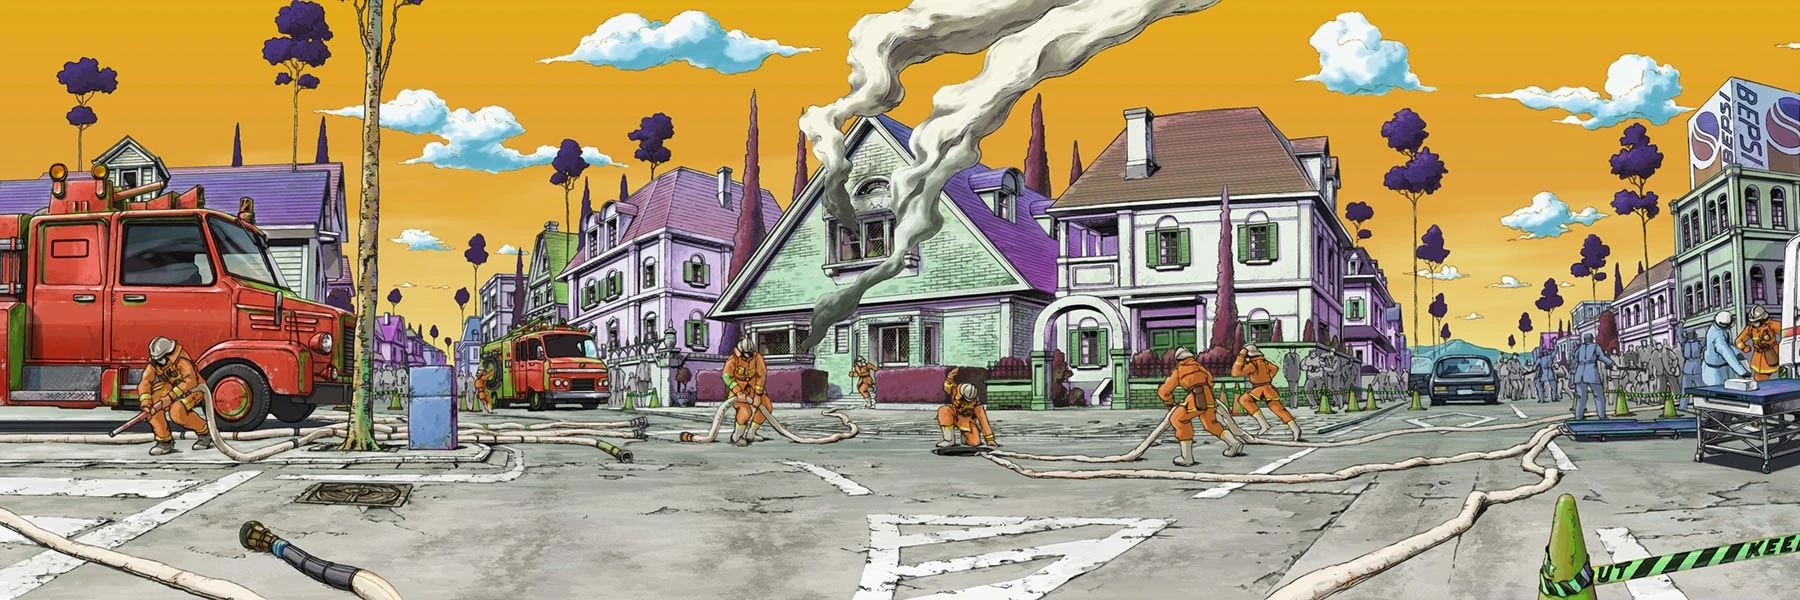
- Morioh (杜王町 Moriō-cho) (from Diamond Is Unbreakable)
- Stage Hazard: Lightning strikes the Pepsi sign as well as the puddles around the stage, damaging and stunning anyone hit as a result (Akira Otoishi is the only one who is immune. Instead his Power Gauge will be set to the first level.)
- Situation Finish: Loser finds themselves in Reimi's Alley before the hands of the dead drag them off into the unknown.
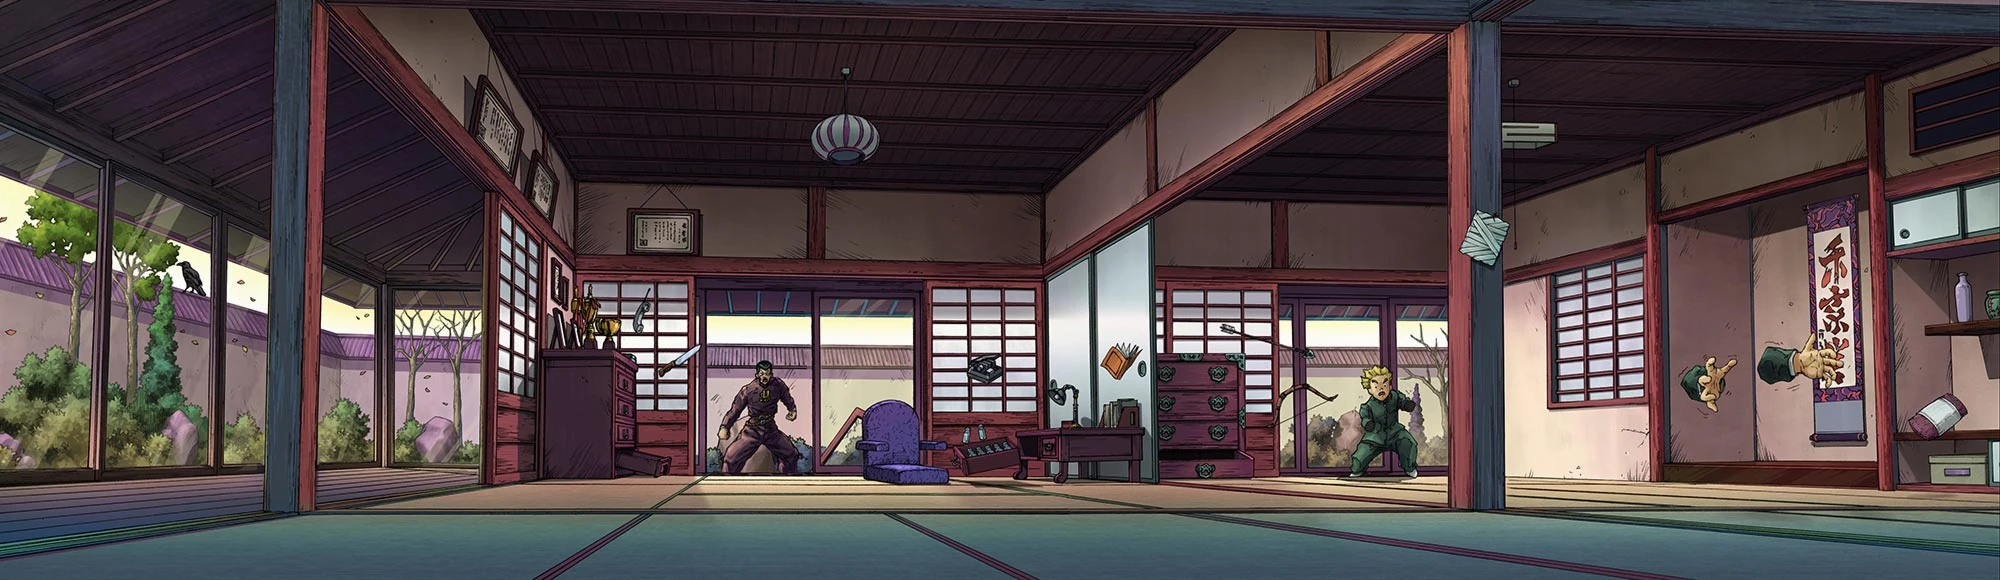
- Kira Estate (吉良邸 Kira Tei) (from Diamond Is Unbreakable): Morioh
- Stage Hazard: Yoshihiro Kira/Atom Heart Father attacks characters with a knife, traveling along a curving path.
- Situation Finish: Loser is thrown into a stack of books. One of them flips open revealing Yoshikage Kira's various nail clipping records and a message where he declares that he cannot be stopped in months where his nails grow more than 30cm.
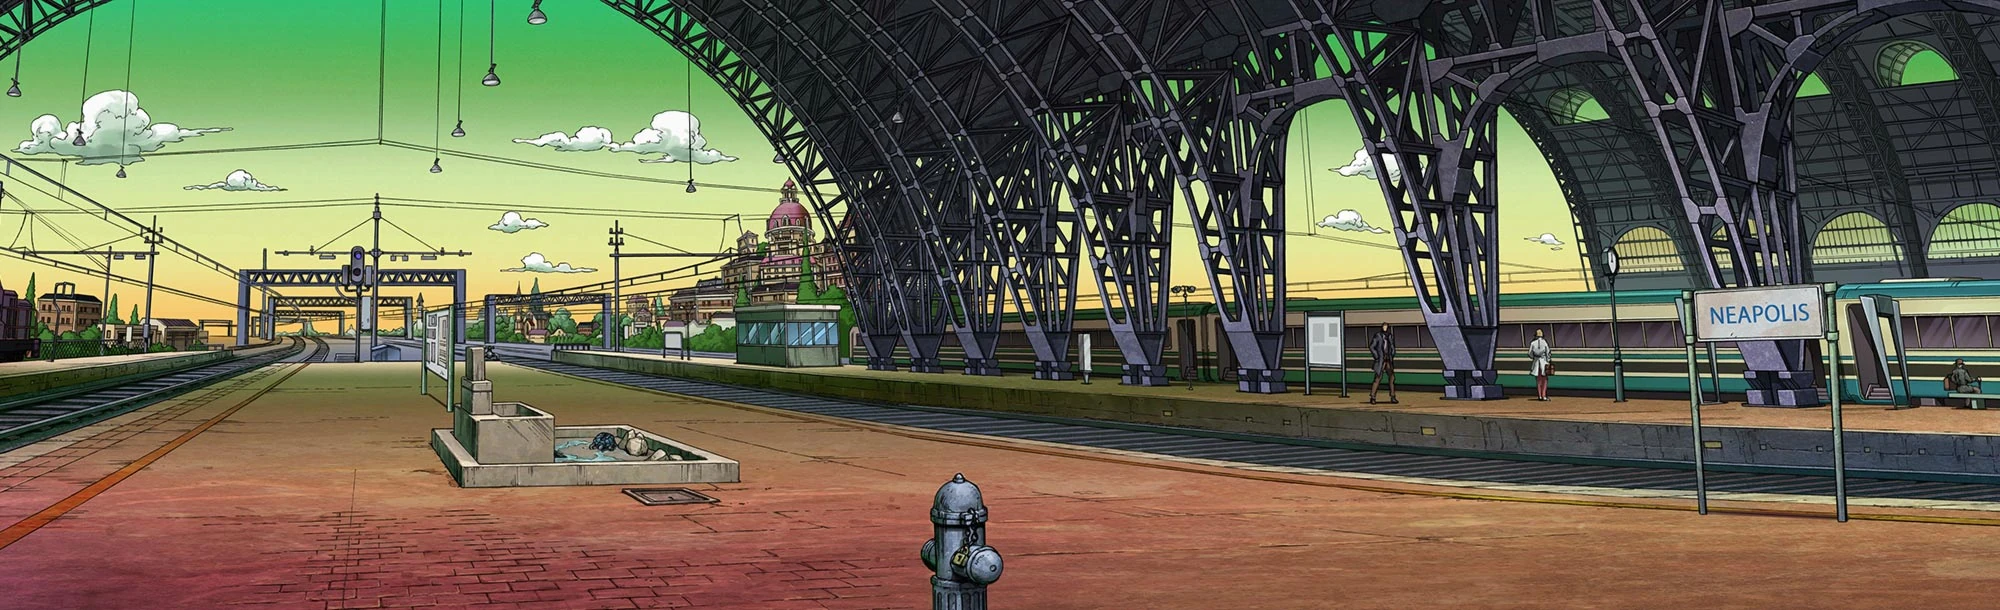
- Naples Station (ネアポリス駅 Neaporisu Eki) (from Vento Aureo): Naples
- Stage Hazard: Pesci's Beach Boy flies out of the train seeking a target, sending fighters flying into the side of the train if caught, and attacking an unlimited amount of times.
- Situation Finish: Beach Boy hooks the opponent by the head or neck from the train. The train then departs and the unfortunate loser is dragged away as Pesci and Prosciutto cheer on.
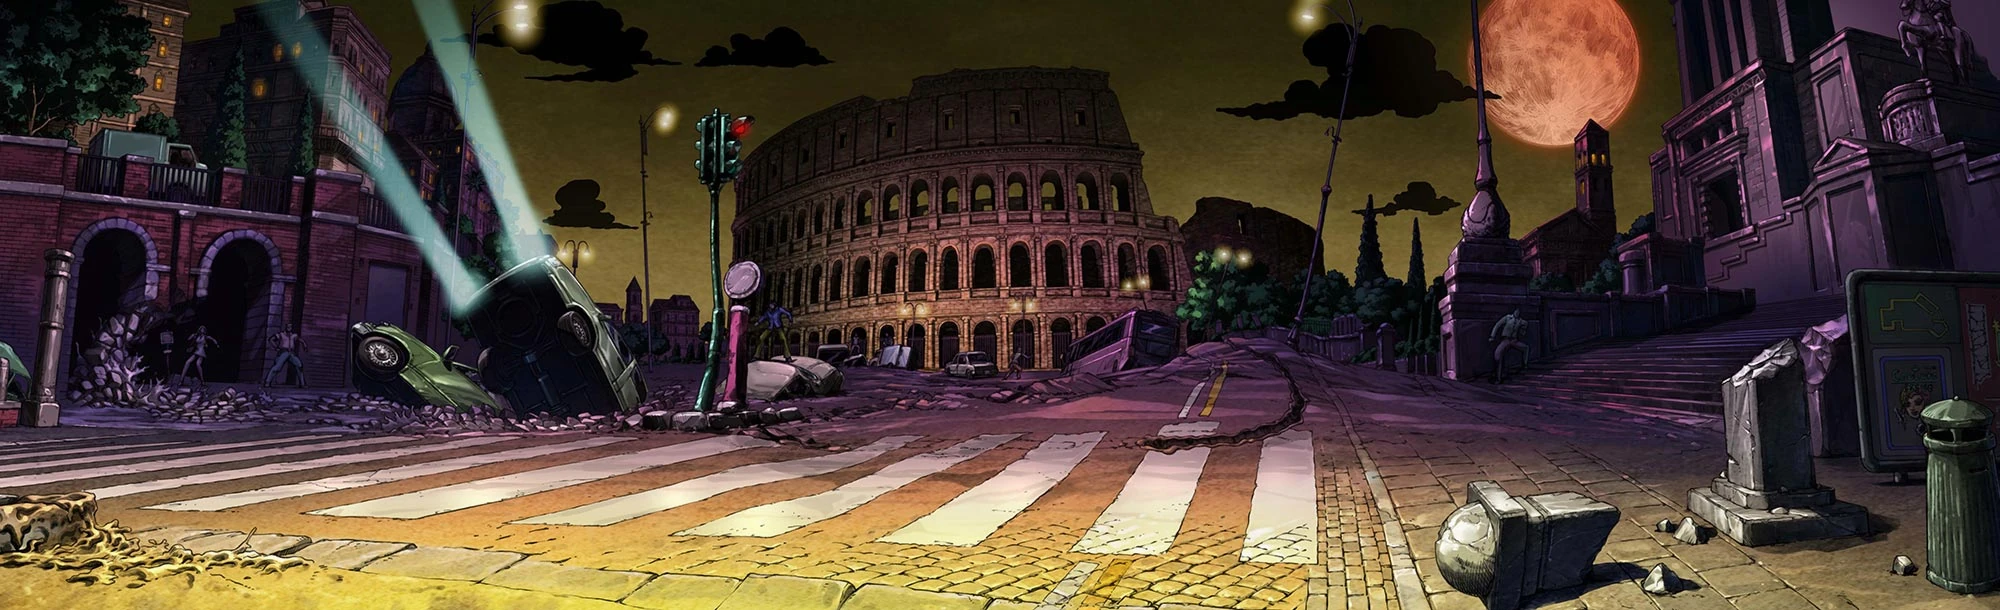
- Rome Streets (ローマ市街 Rōma Shigai) (from Vento Aureo): Rome
- Green Dolphin Street Prison (グリーン・ドルフィン・ストリート刑務所 Gurīn Dorufin Sutorīto Keimusho) (from Stone Ocean)
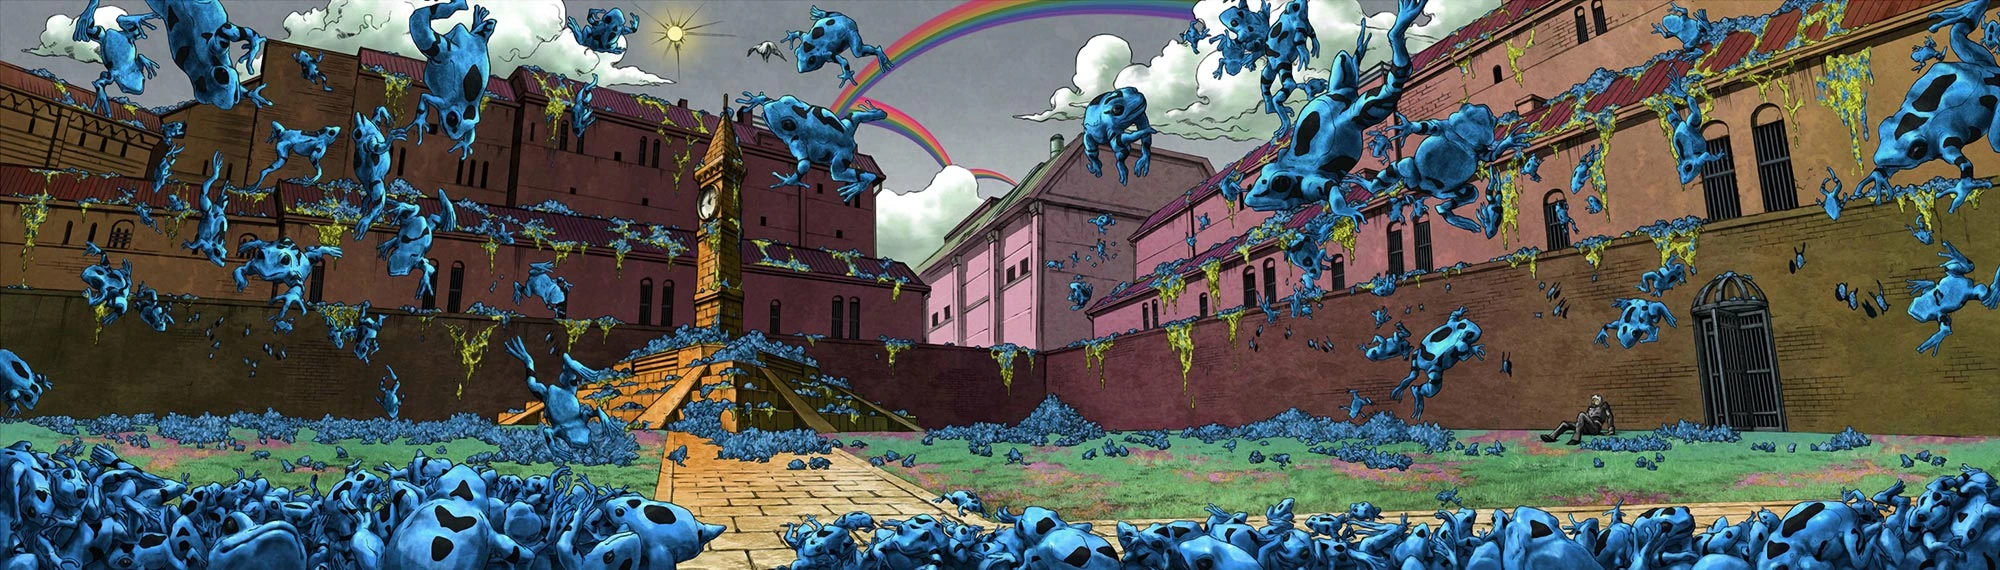
- Stage Hazard: Weather Report's poisonous frog rain. Players hit by the frogs will be poisoned and lose gradually lose health over short amount of time. This occurs an unlimited amount of times.
- Situation Finish: Whitesnake steals a Disc from the fallen opponent (If Pucci himself is one of the fighters, this Situation Finish will not work).
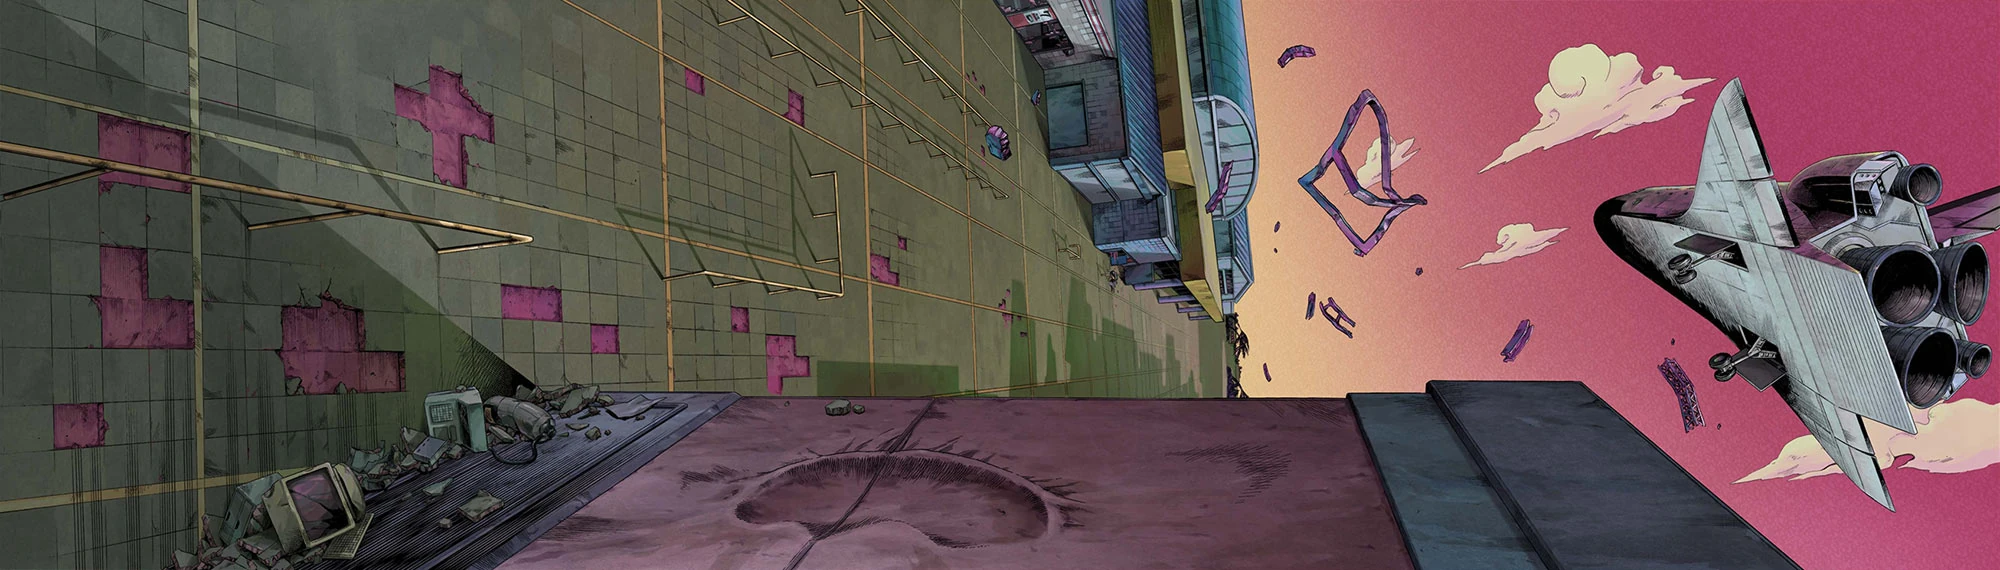
- Kennedy Space Center (ケネディ宇宙センター Kenedi Uchū Sentā) (from Stone Ocean): Cape Carnaveral
- Stage Hazard: C-Moon sends various objects falling to where the players are, with Emporio's shouting. This occurs an unlimited amount of times.
- Situation Finish: Loser is sent flying off the side of the building, hitting their head on the railing and then falling towards the horizon.
- Made In Heaven's Big Bang (from Stone Ocean): Universe
- This stage is only available as part of Pucci's GHA, "Made in Heaven". After Pucci evolves Whitesnake into C-Moon, and then Made In Heaven, the fight moves to outer space with the players standing on a road of light representing the rapidly changing universe. During this special stage, "Made in Heaven" Mode will activate; Pucci will move faster while the opponent moves far slower. Although Giorno can use his GHA, "Your end has no ending!", to activate Gold Experience Requiem and nullify the effect, and Kosaku-Kira's GHA, "Bite the Dust", will revert the stage back to the previous stage before Made in Heaven was activated. This stage is the only stage that lack Hazards or Situation Finishes of any kind.
- Along the Philadelphia Coastline (フィラデルフィアの海岸沿い Firaderufia no Kaigan-zoi, simply "Philadelphia Coastline" in the English localization) (from Steel Ball Run): The Atlantic Ocean
- Stage Gimmick: Lucy Steel's Ticket to Ride grants players who touch the column of light a stock of Heart Heat Gauge, only recurring if the light fades before anyone touches it.
- Situation Finish: Loser is tossed into a sign warning travelers about bears.
- Wall Eyes (壁の目 Kabe no Me) (from JoJolion): Morioh
- Stage Hazard: Yasuho Hirose's Paisley Park activates, drawing Joshu Higashikata to her as he runs about the stage barging through anyone in his path, rock in hand.
- Situation Finish: Loser is sent flying and landing near Yasuho, who screams in surprise, angering Joshu as he smashes their head with a rock.
|
|
|
|---|---|---|
|
|
|
|
|
|
|
|
|
Characters


Stands


Unplayable characters
- Robert E. O. Speedwagon - He is seen in the background of the Dio's Castle stage and he's the main explanatory character on the game (Main Menu).
- Doobie - He appears in the background of the Dio's Castle stage.
- Erina Pendleton
- Wang Chan - He appears as the navigation character for the Gallery Mode store.
- George Joestar I - Appears as a support in Campaign Mode.
- Dire - Appears as a support in Campaign Mode.
- Aztec Chief - He appears as one of the supports in Campaign Mode.
Campaign Mode Surprise Supports
- Ken Oyanagi - Challenges the player to a game of Rock Paper Scissors. Paying 1 extra energy point will take away one of the options for Ken, Paying 2 points will leave Ken with only one choice. Winning will allow the player to select a boss as their next opponent
- Cairo Informant - If the player pays him 2 extra energy points, they can select a boss as their next opponent.
Boss Fight
- Cioccolata - Activates Green Day, allowing the player to deal more damage to boss health. Spending an extra energy point boosts the effect.
- Foo Fighters - Gives the player two choices: Either inflict 150 damage to any boss (cannot defeat boss), or replenish 1 energy point.
Gallery
| Phantom Blood | |
|---|---|
")
")
")
| Battle Tendency | |
|---|---|
")
")
")
")
")
")
| Stardust Crusaders | |
|---|---|
")
")
")
")
")
")
")
")
")
")
")
")
")
")
")
")
")
")
| Diamond Is Unbreakable | |
|---|---|
") Yoshikage Kira (Original form) ") Yoshikage Kira (Awakened Kosaku Kawajiri form) | |
")
")
")
")
")
")
")
")
")
")
")
")
")
")
")
")
")
| Vento Aureo | |
|---|---|
")
")
")
")
")
")
")
")
")
")
")
")
")
| Stone Ocean | |
|---|---|
")
")
")
")
")
")
")
")
")
")
| Steel Ball Run | |
|---|---|
")
")
")
")
")
")
")
")
")
")
")
| JoJolion | |
|---|---|
")
")
| Bonus | |
|---|---|
")
")
")
")
")
")
")
")
")
")
")
")
")
")
Trailers
")
")
")
")
")
")
")
")
See also
- JoJo's Bizarre Adventure: All-Star Battle OST
- JoJo's Bizarre Adventure: Stardust Shooters
- JoJo's Bizarre Adventure: All-Star Battle League
- Jojo's Bizarre Adventure HD
- JoJo's Bizarre Adventure: Eyes of Heaven
Name Changes
Some of the names in the non-Japanese territories were changed to avoid copyright lawsuits. Namco Bandai pledged to change the legally-risky names while keeping the patterns Hirohiko Araki aimed for, without obscuring the name references. Below is a list of the name changes that are more than just spelling:
Trivia
- The game was promoted by JoJo's Bizarre Adventure: All-Star Battle League, a fan-based tournament competition created in order to promote All-Star Battle. It was announced on June 9, 2013 with the fifth trailer of the PS3 game. The event consists of all the characters announced, with Yoshikage Kira being the only DLC-Character to be in.
- The Special Edition was sold out in 20 minutes just after ordering was opened on Amazon. The 89th reopening of ordering was sold out in 23 seconds, and 92nd reopening was finished in 12 seconds.
- CyberConnect2 president and CEO Hiroshi Matsuyama explained that JoJo's Bizarre Adventure: All-Star Battle was conceived “partly thanks to” the 2006 video game JoJo's Bizarre Adventure: Phantom Blood. When that game was finished the idea of a new game involving all the parts came out.[4]
- This is the second game to have more than one Dio as playable character (Dio Brando from Part 1 and "DIO" from Part 3), Heritage for the Future had two versions of Dio as well (DIO with The World and "Shadow Dio"). It's also interesting to note that the latter involves two versions of Dio from Part 3 while ASB consists of versions from different parts.
- The game has received a perfect score (40/40) from Famitsu magazine, making JoJo All-Star Battle the only licensed video game as well as the only fighting game to receive a perfect score from Famitsu.
- Most of the Stand users can perform Rush Mode (ラッシュモード Rasshu Mōdo) according to their moves' properties. The Rush Mode is itself a throwback to Heritage for the Future's Blazing Fists Match. So far, Jonathan is the only non-Stand user to perform the Rush Mode by using his Overdrive Barrage move.
- List of the characters that can perform Rush Mode:
- Jonathan Joestar
- Jotaro Kujo
- Jean Pierre Polnareff
- DIO
- Josuke Higashikata
- Giorno Giovanna
- Bruno Buccelati
- Guido Mista
- Narancia Ghirga
- Jolyne Kujo
- Johnny Joestar
- Josuke Higashikata (Jojolion)
- The Yes/No options when choosing something are also memetic phrases. The Yes option is "YES ! YES ! YES !" from Telence T. D'arby's Stand Atum when he reads Jotaro's mind and the No option is Rohan Kishibe's infamous "I refuse/Daga Kotowaru" phrase (localized to "Like hell I will!" in English-language versions).
- When choosing background music, selecting the third option will allow any music file that has been downloaded onto the PS3 to be played as background music in any stage.
- Not counting when he's mounted, Johnny Joestar is the only character who unable to jump or naturally dash due to being paralyzed from the waist down (needing to use the skill "I have to get there!" in order to 'dash' using his spinning nails). While he can duck it hardly makes a visual difference due to him being on the floor already and being out of reach from many attacks.
- If Wamuu, Kars or Esidisi fights in the Skeleton Heel Stone, the crowd will shout their names, recreating the scenes in Part 2. This would be the first time Esidisi's name is chanted by the crowd in this scenario.
- All-Star Battle is the second JoJo game playable outside Japan, the first being JoJo's Bizarre Adventure: Heritage for the Future.
- Part 3 Joseph, Vanilla Ice and Part 3 DIO are one of few characters to have two different play styles. All three of them use Stands, whilst Joseph also uses the Ripple and can perform "Ripple Breath", Ice and DIO retain a specific ability exclusive to Vampirism, allowing them to drain the opponent's health and add it to their own.
- Along with costumes seen on iconic volume covers, certain costumes also show up from side materials as well: Part 3 DIO's JOJO'S BIZARRE ADVENTURE OVER HEAVEN outfit, Fugo's attire from the novel Purple Haze Feedback, and Rohan's outfit from Under Execution Under Jailbreak.
- Some animations were inspired not just by the manga, but other materials as well. Part 1 Dio, after performing his Space Ripper Stingy Eyes HHA, rears backward much like both versions of DIO did in the Capcom fighting game, and when Part 3 DIO performs a stand-alone Time Stop, The World flies outward, arms outstretched and hands curled into fists similar to how it appeared in the OVA.
- Vampire characters (Dio Brando, DIO and Vanilla Ice) and Pillar Men characters (Wamuu, Kars and Esidisi) can't fight on stages that contains sunlight. To play on those stages they need to be equipped with the Red Stone of Aja on the character select screen, which is unlocked by beating their respective parts in Story Mode.
- When first released, Vanilla Ice was the only character who had a timer for how long his Stand could be activated for. A recent patch has changed this so that the meter drains when Cream performs a move.
- During Baoh's hair taunt against Josuke, the narrator explains that Baoh does not trust Josuke from the way his hair smells, referencing Baoh's ability to distinguish friend from foe via their scent.
- All-Star Battle has two alternate free-DLC costumes for Jotaro and Polnareff based on promotional material for Heritage for the Future.
- The western edition of the game has a special Arcade mode that functions like a traditional fighting game arcade mode consisting of eight battles. In this mode Gold can be earned through fighting each enemy, with better grading rewarding more gold. Sometimes a Harvest icon will replace the icon of Jotaro and DIO and will increase the amount of Gold earned.
- The western version of the game has a different cover art compared to the Japanese release. The western cover art is centered more around Part 3, with only Jotaro, Star Platinum, and DIO displayed. For the Italian version of the game, Giorno and Gold Experience appear as the cover characters instead.
- Despite the name changes in the western version, the voices haven't been altered to match the subtitles. As such, the proper names of either Stands or characters can clearly be heard.
- During the opening lines in the last fight of the Diamond Is Unbreakable part of the story mode in the English version there is a typo where the subtitles will actually show the name Crazy Diamond instead of the English name Shining Diamond. Despite being a typo this is the only time in the English version of the game one of the original names for a Stand is seen.
- The DLC is handled differently in western version of the game with Old Joseph Joestar, Lisa Lisa, and Ikuro Hashizawa being the first pair of DLC characters to be released and Yoshikage Kira and Shigechi, the first DLC characters for the game in Japan, being the last DLC characters to be released.
- Because Baoh was released earlier than he was in Japan the second campaign pack to come out was actually the last as it contained the rest of the campaigns for Campaign Mode.
- The English version of All-Star Battle has a much shorter recharge timer for Campaign Mode; the Japanese version's current recharge time after a few updates is 5 minutes, meanwhile the English version has reduced this significantly to 2 minutes.
- In the English version of the game, if Joseph Joestar beats the DLC character Lisa Lisa, his victory screen has him saying "Why did it have to come to this?! You are tearing me APART, Lisa Lisa!".[5] This quote is a joke-translation using the same quote from the movie The Room in which Tommy Wiseau's character yells out "You are tearing me APART, Lisa!"[6]
References
- ↑ A Famitsu article detailing the content of a flier promoting the game
- ↑ Jojo's Bizarre Adventure: All Star Battle EU Release Date
- ↑ Famitsu with detailed info on the game
- ↑ An interview with CyberConnect2 president and CEO Hiroshi Matsuyama
- ↑ JoJo's Bizarre Adventure: All-Star Battle Special Dialogue Parts 1 to 3 - HD (quote appears on 7:07)
- ↑ You're Tearing Me Apart, Lisa! - The Room (2003) - 4K (HD) Scene Clip
| Games | |
|---|---|
| JoJo video games | |
| Jump video games | |
| Other games | |